
Produce your first court-ready export
This tutorial walks you end to end: you enable Forensic Mode on a Case before you start searching, bookmark the results you want to keep, and then generate a downloadable Report from those Bookmarks. The result is an audited, exportable record of your search scoped to one Case.
The order matters. Forensic Mode is what makes a Case retain Bookmarks and History and provide chain-of-custody, so you switch it on at the start — before you collect anything (per Lee, 2026-07-08).
Before you start
Section titled “Before you start”- You need a Case to collect into. Every account starts with a built-in Default Case, or you can create your own in Case Management.
- Forensic Mode determines whether a Case keeps a durable record. With Forensic Mode on, the Case retains bookmarking and history and provides chain-of-custody. A Private Case (Forensic Mode off) keeps no bookmarking and no history — it is effectively ephemeral (per Lee, 2026-07-08).
- Because that retention is decided by the Case’s setting, turn Forensic Mode on before you run the searches you intend to preserve.
Step 1 — Choose or create your Case
Section titled “Step 1 — Choose or create your Case”- Open Case Management from the left navigation.
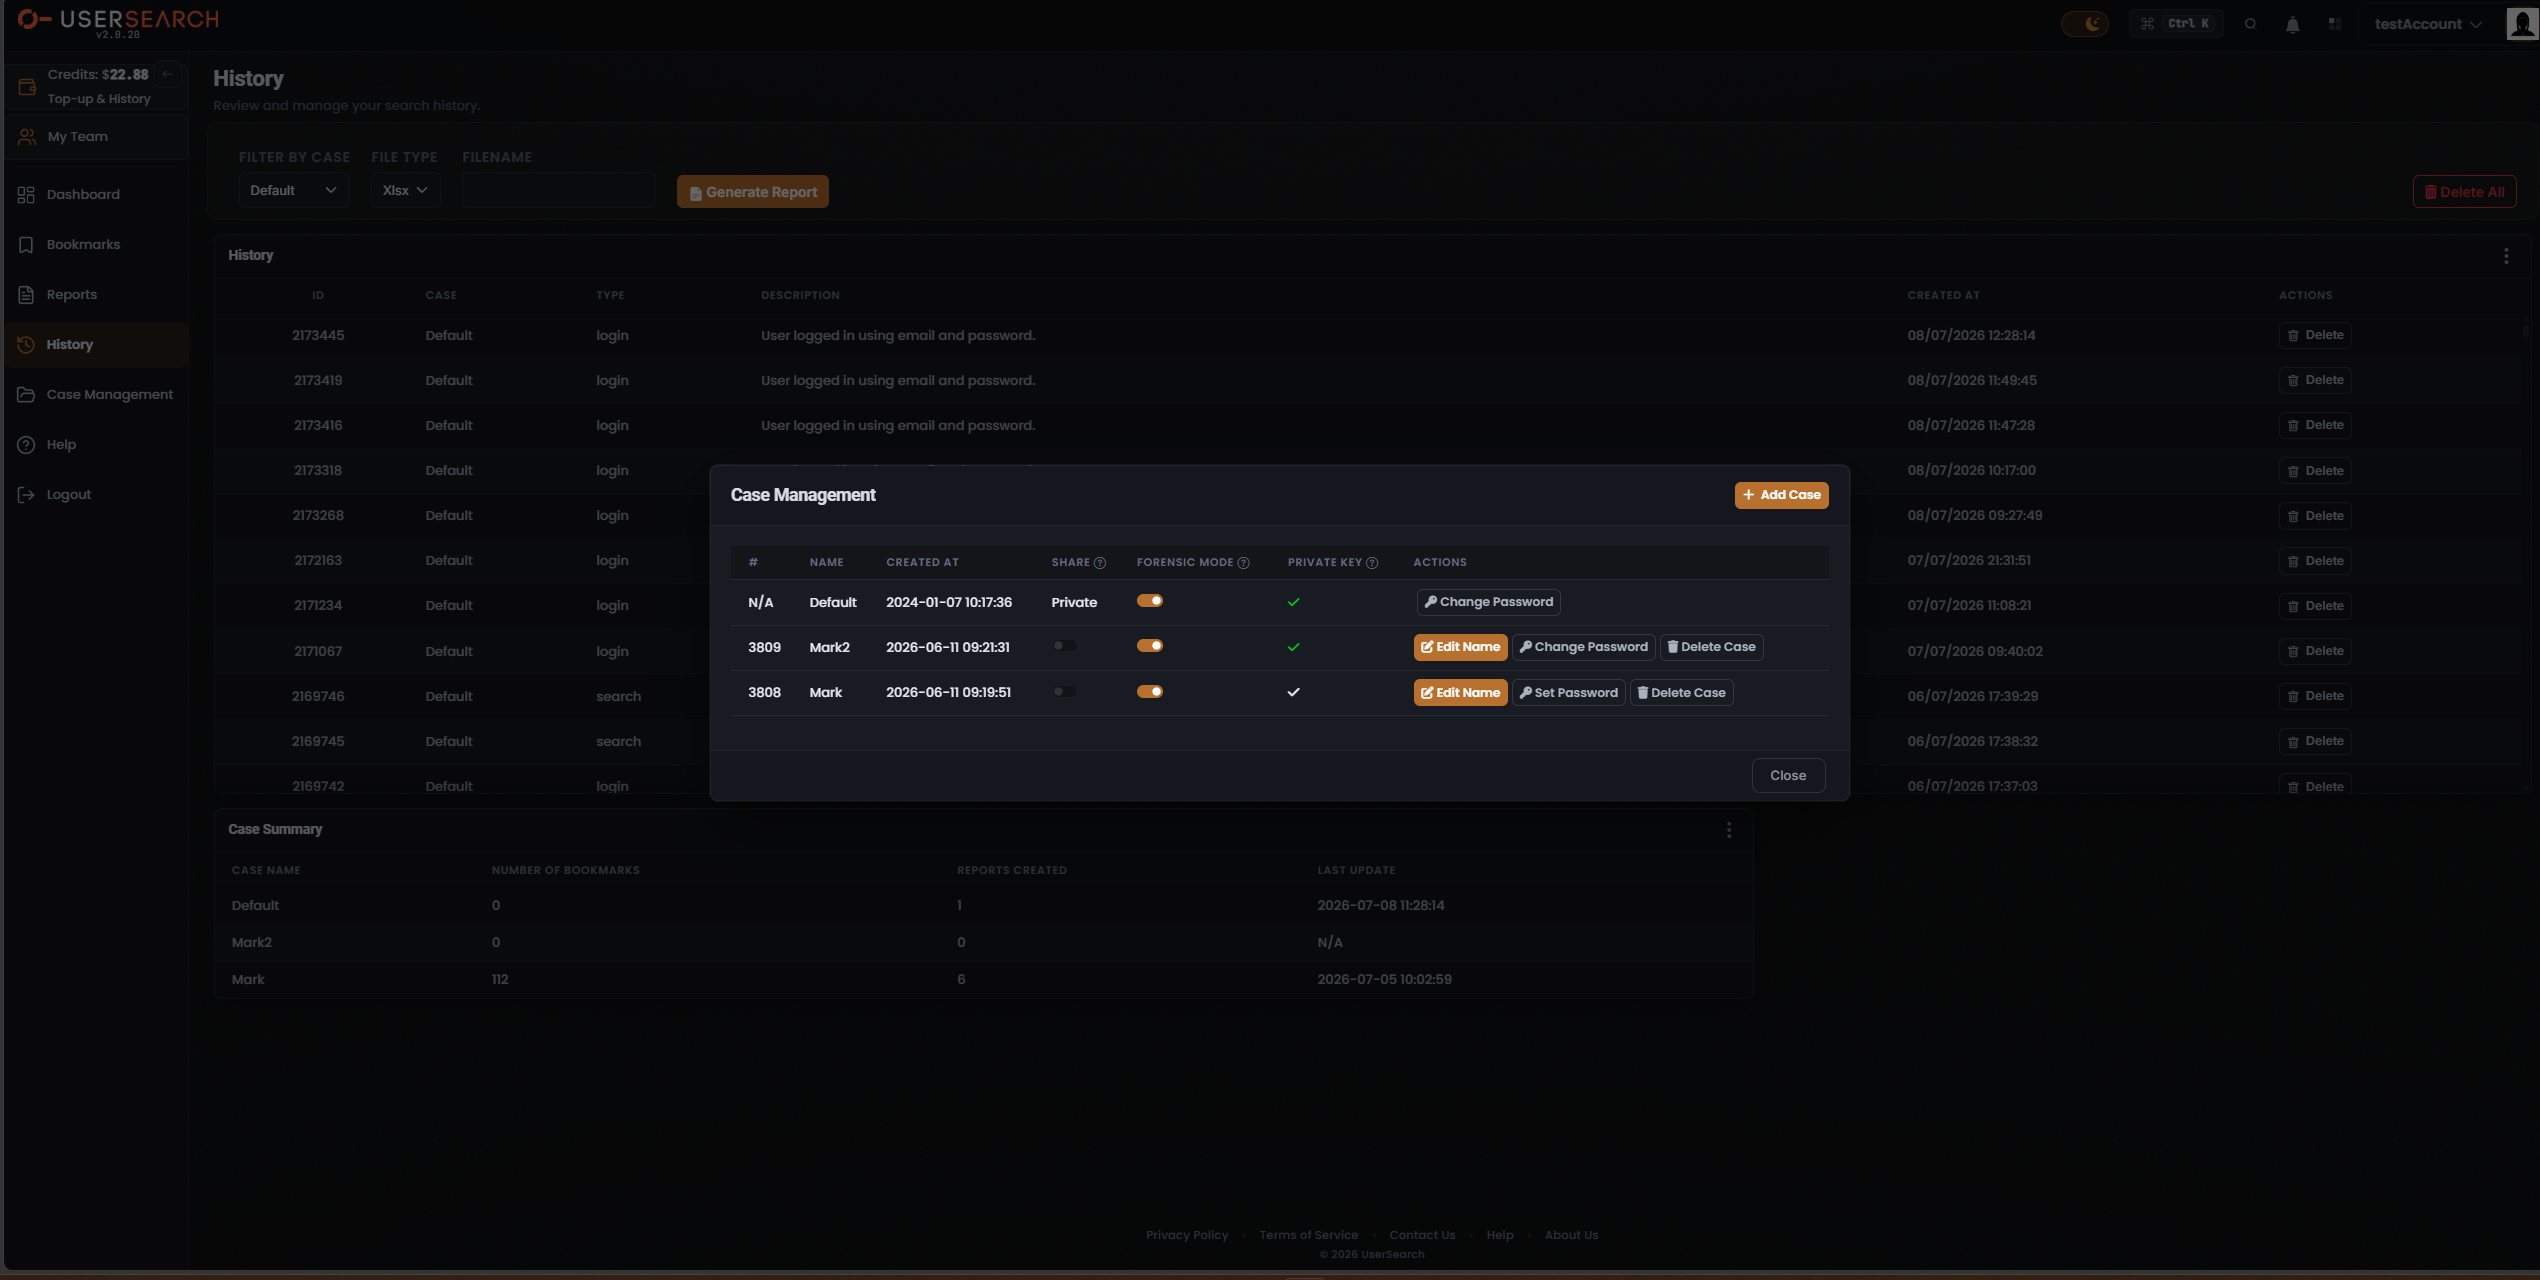
- Review the case table. Each Case shows its NAME, CREATED AT, SHARE state, FORENSIC MODE switch, PRIVATE KEY indicator, and an ACTIONS column.
- To collect into a fresh, dedicated Case, select + Add Case (top-right) and give it a name.
- To use an existing Case instead, note its name so you can select it as your active Case when you search.
Step 2 — Turn on Forensic Mode first
Section titled “Step 2 — Turn on Forensic Mode first”Forensic Mode is set per-Case, using the FORENSIC MODE switch on that Case’s row in Case Management.
- Find your Case’s row in the case table.
- Set its FORENSIC MODE switch to on (the orange position).
- Confirm the switch reads on before you continue. This is the step that makes the Case retain your Bookmarks and History and provide chain-of-custody (per Lee, 2026-07-08).
Step 3 — Run your searches and bookmark your findings
Section titled “Step 3 — Run your searches and bookmark your findings”With Forensic Mode on for your Case, collect your evidence.
- Make your Case the active search context using the Case selector.
- Run your searches from the Dashboard.
- For each result you want to preserve, bookmark it. A Bookmark is a single saved result, associated with your Case, kept for later review and export.
Bookmarking is distinct from an ad-hoc Export of the current results table, and distinct from a Report. In this workflow you bookmark first, then generate a Report from those bookmarks.
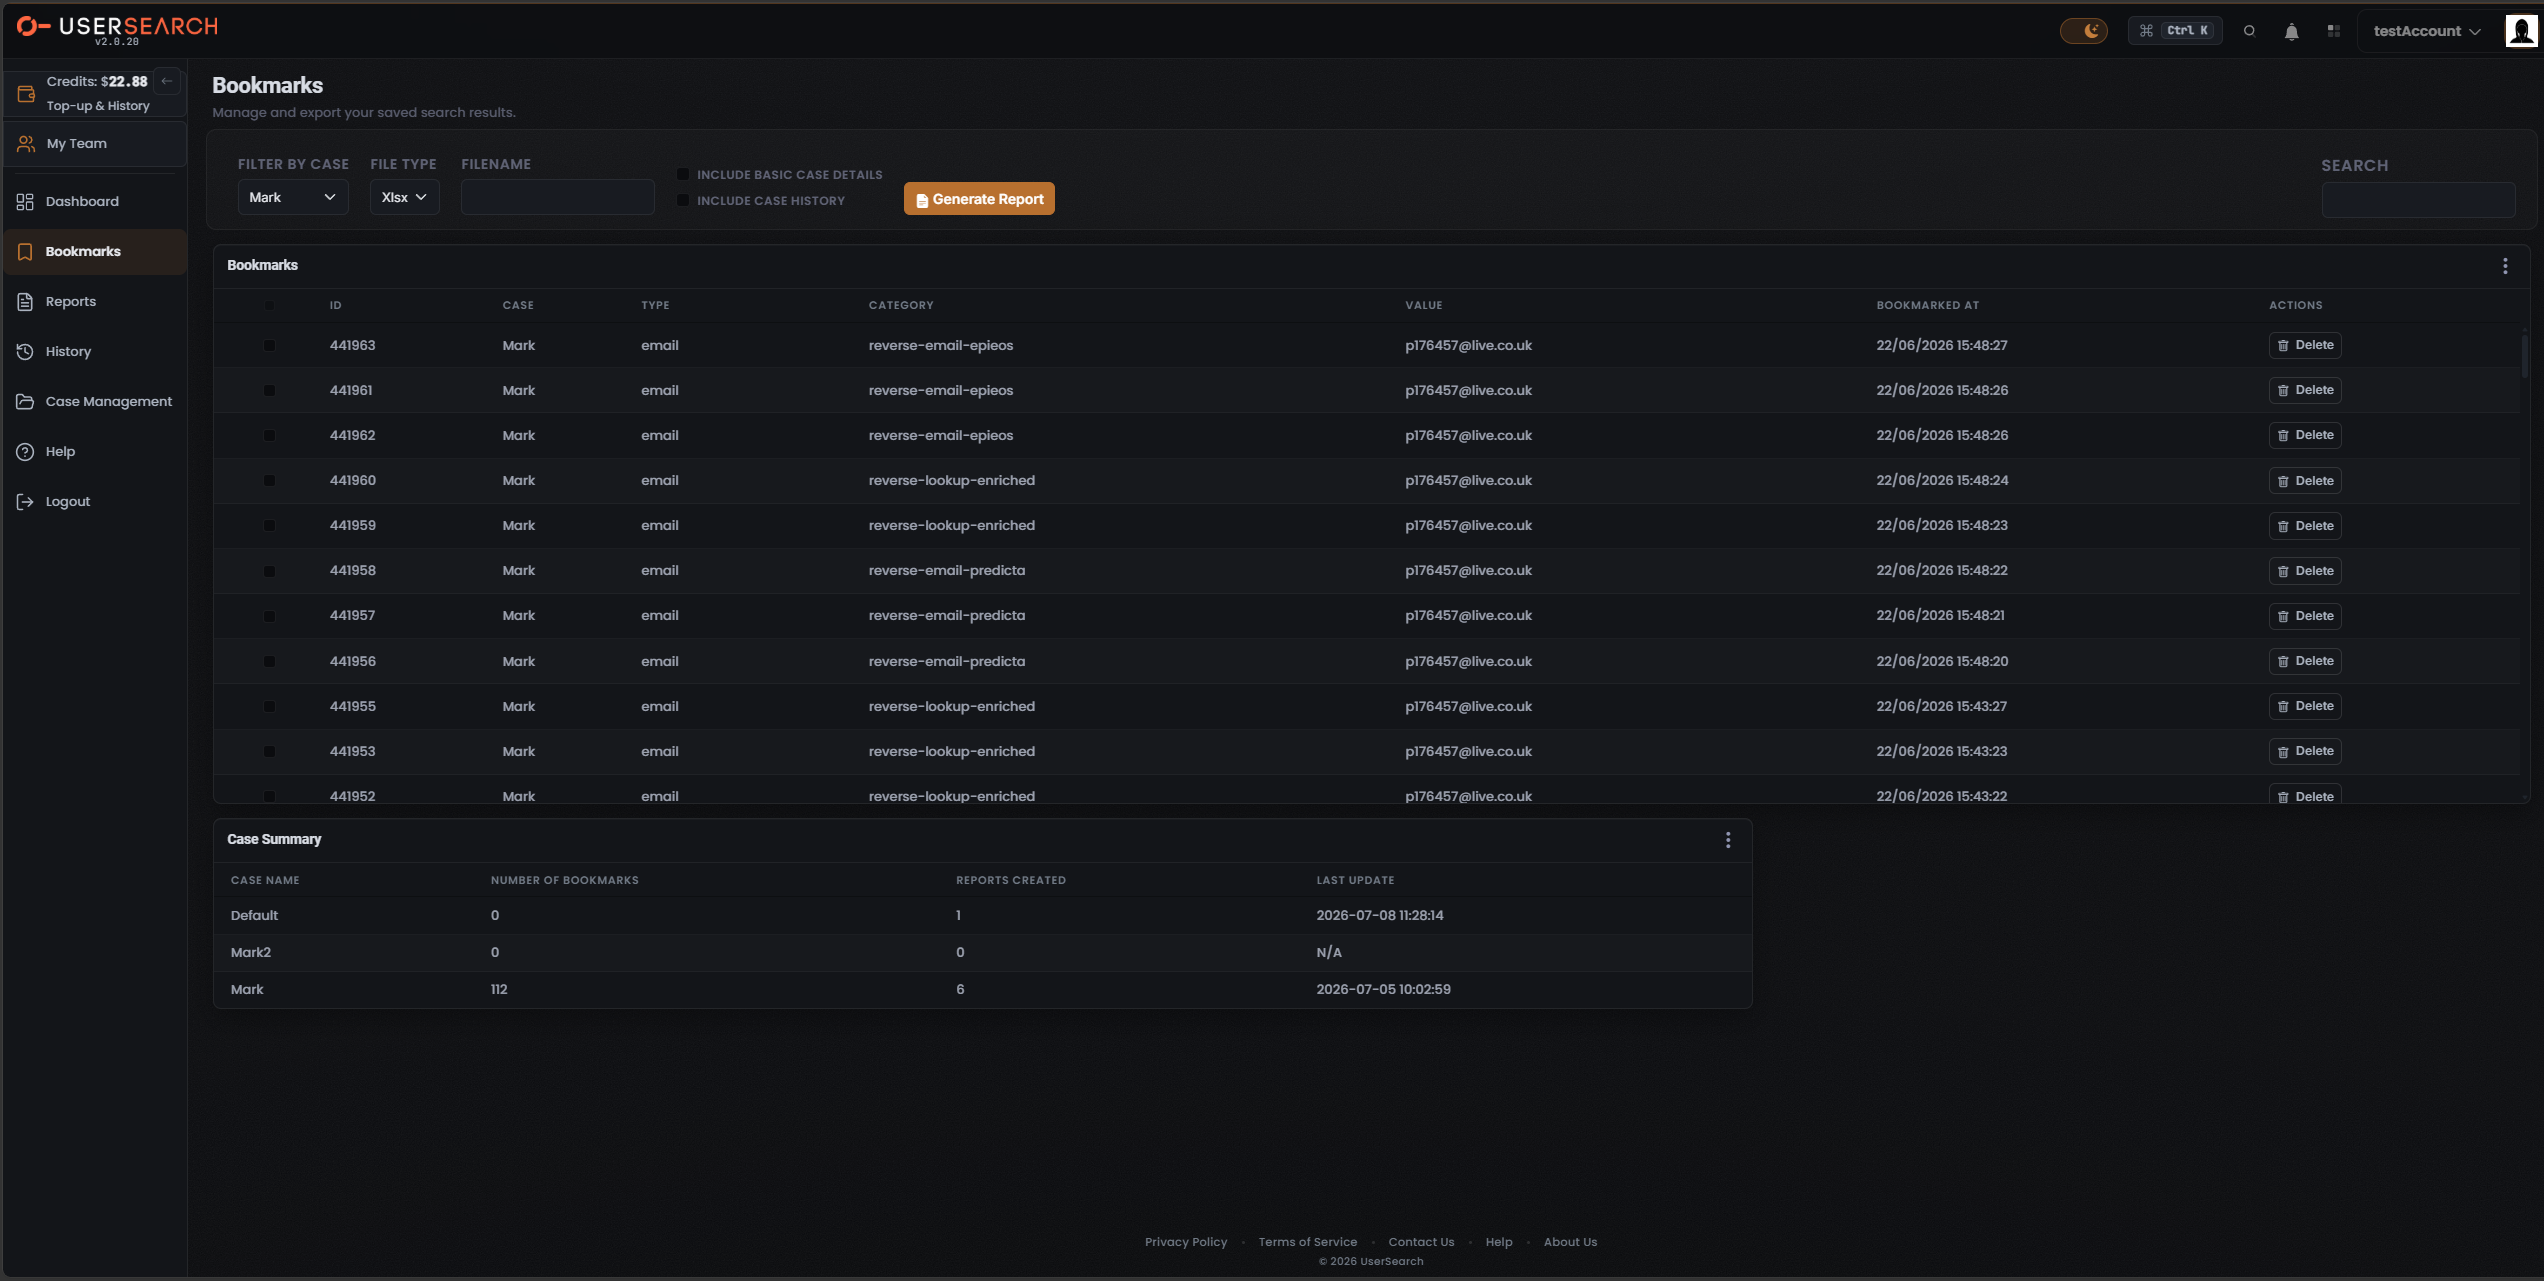
Each saved result appears on the Bookmarks page, where every row records its ID, CASE, TYPE, CATEGORY (the underlying data source or enrichment source behind the result), VALUE, and BOOKMARKED AT time.
Step 4 — Generate the Report
Section titled “Step 4 — Generate the Report”Reports are generated from the Bookmarks page. (The Reports page only lists, downloads, and deletes them.)
- Open Bookmarks from the left navigation.
- In the report-generation panel at the top, set FILTER BY CASE to your Case. This scopes both the bookmarks table and the Report to that single Case.
- Set FILE TYPE to Xlsx.
- Enter a FILENAME for the Report file.
- Optionally enable INCLUDE BASIC CASE DETAILS to embed basic case details, and INCLUDE CASE HISTORY to embed the Case’s history, into the Report.
- Select Generate Report.
The Report is produced from your selected Case, file type, filename, and include options, and then appears on the Reports page.
Step 5 — Download your export
Section titled “Step 5 — Download your export”- Open Reports from the left navigation.
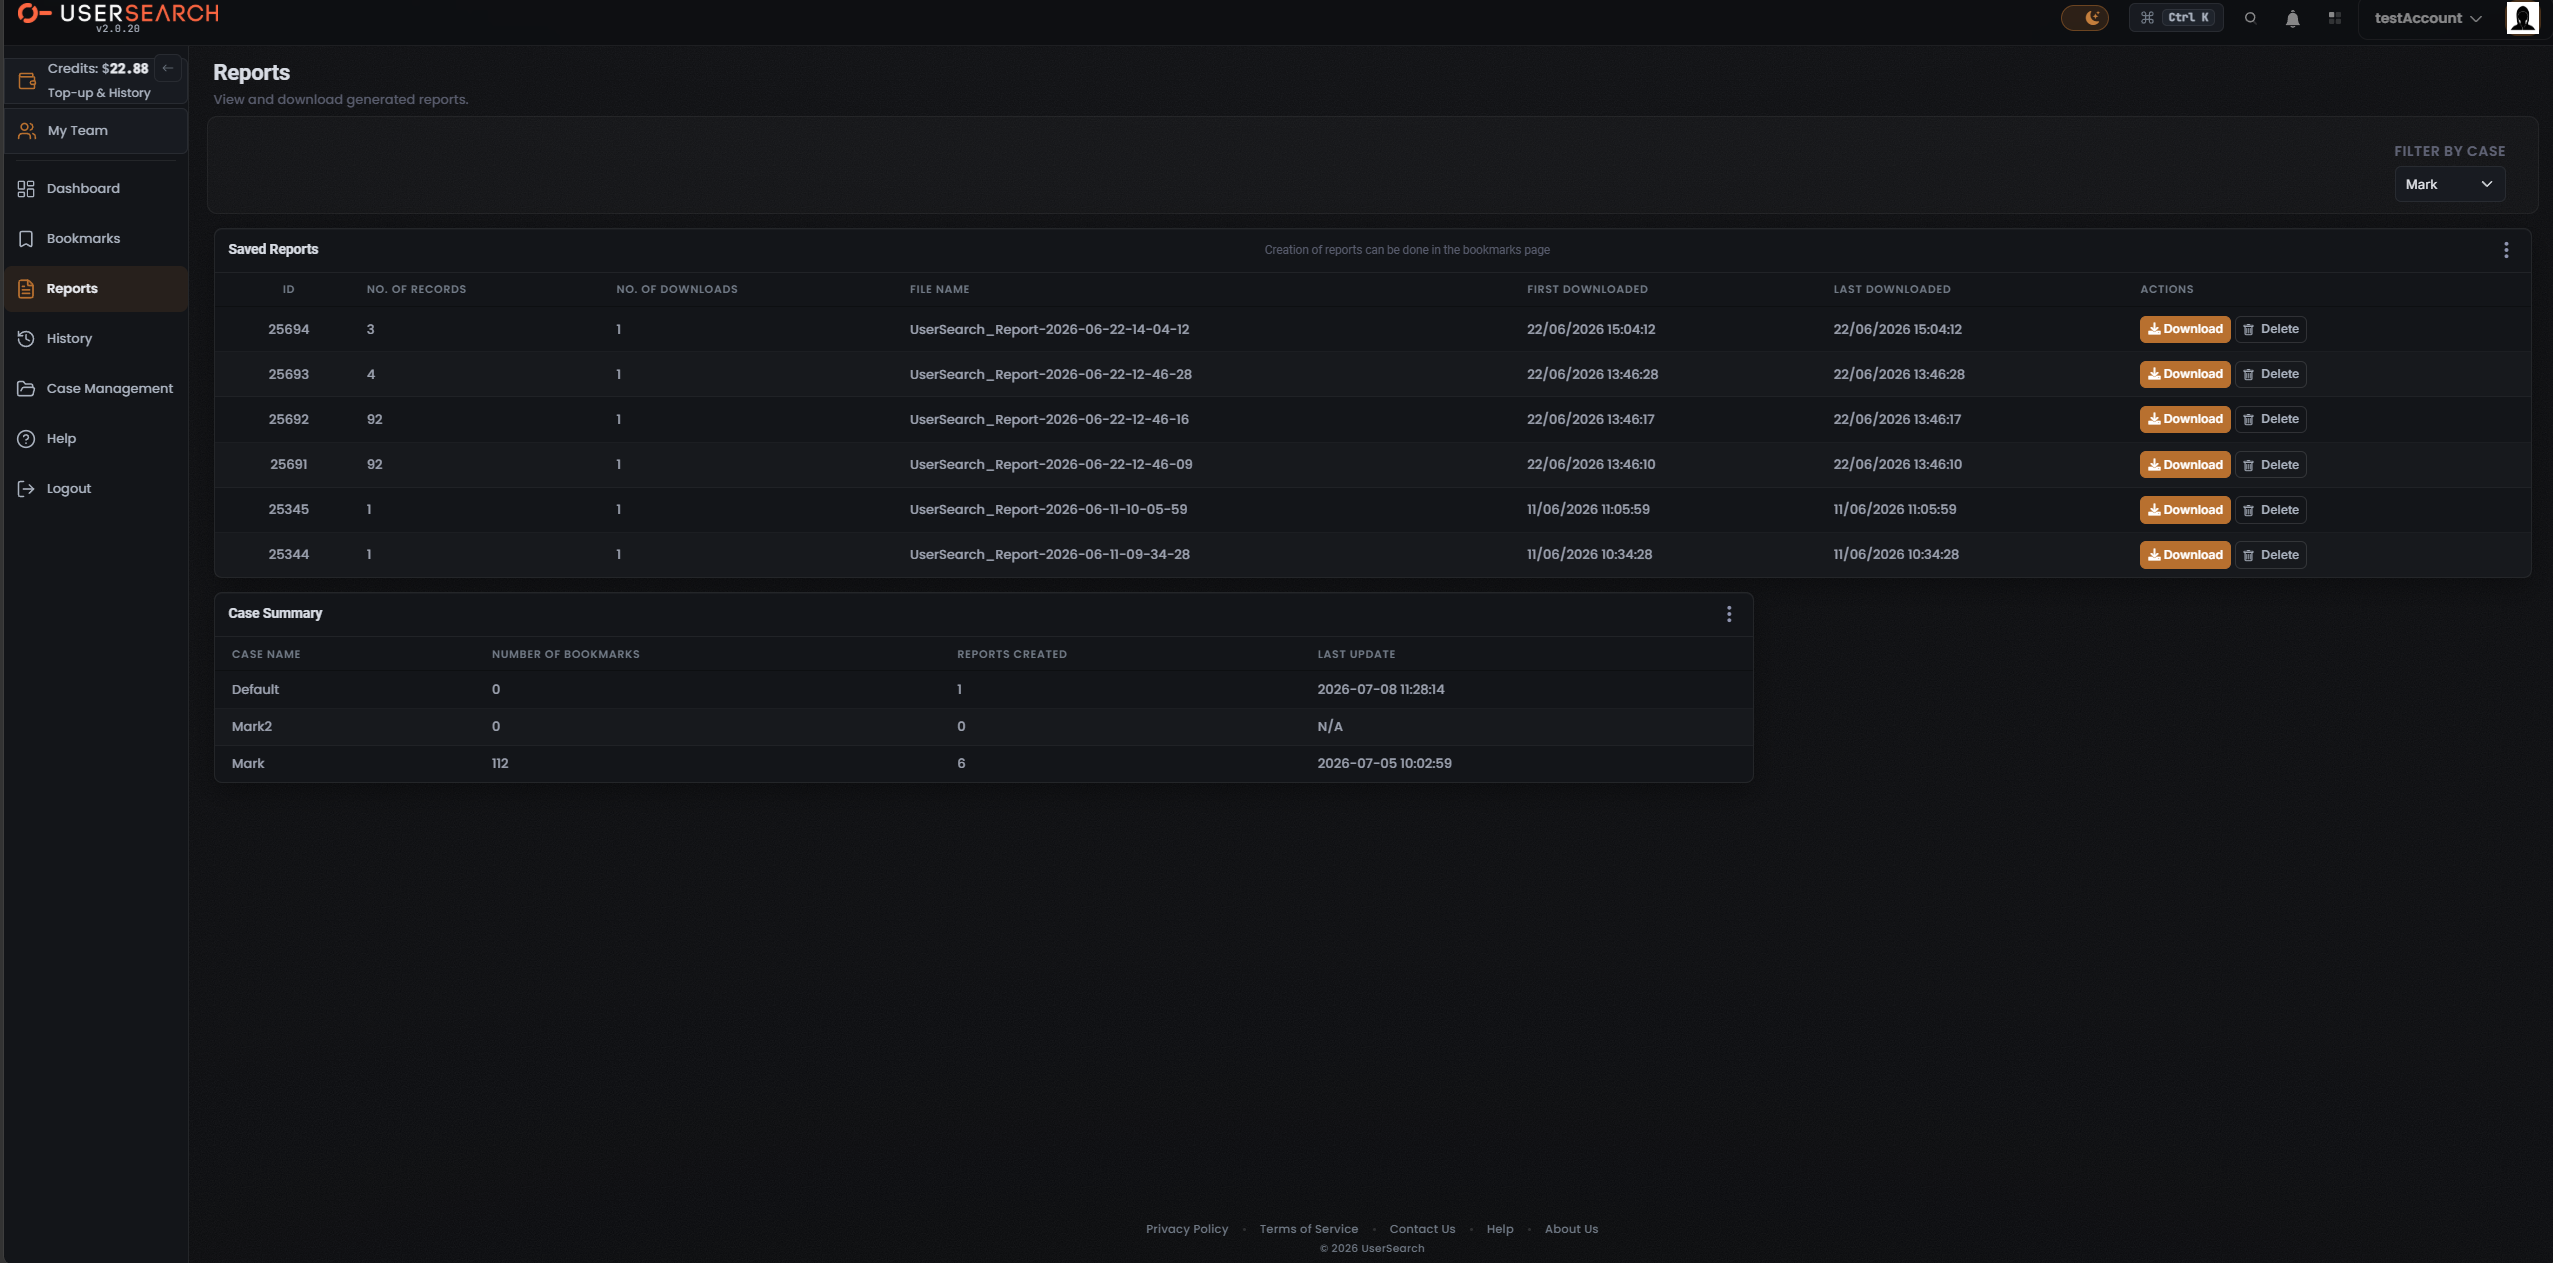
- Set the FILTER BY CASE dropdown to your Case to narrow the Saved Reports table.
- Find your Report in the list. Each row shows its ID, NO. OF RECORDS, NO. OF DOWNLOADS, FILE NAME, FIRST DOWNLOADED, and LAST DOWNLOADED.
- Select Download on that row to save the file.
Step 6 — Confirm what you collected
Section titled “Step 6 — Confirm what you collected”Use the Case Summary panel at the bottom of the Bookmarks, Reports, and History pages to verify your Case’s totals before you rely on the export.
The panel lists, per Case, the CASE NAME, NUMBER OF BOOKMARKS, REPORTS CREATED, and LAST UPDATE. Confirm your Case shows the bookmark count you expect and that its REPORTS CREATED count reflects the Report you just generated.
You can also open the History page to review the Case’s retained search and login activity — the audit trail that Forensic Mode preserves. History is retained for Forensic-on Cases and is not kept for Private Cases (per Lee, 2026-07-08).

What you produced
Section titled “What you produced”- A Case with Forensic Mode on, retaining bookmarking, history, and chain-of-custody.
- A set of Bookmarks — your preserved findings — scoped to that Case.
- A downloadable .xlsx Report generated from those Bookmarks, verifiable against the Case Summary counts.
Verified against UserSearch v2.0.20